Lagana: Ash Monday’s traditional bread

Ash Monday or Clean Monday, marks the beginning of Lent, a 7-week period of strict fasting, in preparation for Easter. During this time, the Greek Orthodox church prohibits the consumption of all animal products (meat, poultry, fish, dairy, eggs). Seafood is allowed, but on some days even olive oil is proscribed. Essentially, the faithful become vegans for 48 days.

Although the long Lenten fast is considered -by even the most pious- a strict and difficult fast, Greeks begin it with a bang, a traditional feast, featuring the best of the allowed foods. Customs vary from place to place as to what this meal may include but the undisputed must of the day is a sesame-sprinkled flat bread called Lagana.

It is said that originally Lagana was unleavened, however these days it is always made of leavened bread dough, sometimes with the addition of a little sugar. That means that if you know how to make bread, you know how to make Lagana.

Let’s get started:

Lagana (Greek Lenten flat bread) recipe

Active cooking time: about 30 minutes

Rising time: about 20 minutes

Baking time: about 30 minutes

Recipe of medium complexity (easy for those with some bread-making experience)

Appropriate for vegetarians and vegans. Kosher & Halal.

Ingredients for one large lagana

1/2 kilo (1 pound) of flour (see Note 1, below)

Dry yeast and water, proportional to the amount of flour you’ll be using

a little salt

sesame seeds

Optional ingredients

1-2 tablespoons of sugar

2 tablespoons of olive oil

Utensils Bowl for mixing the dough, countertop or table, large baking tin (optional: baking paper, rolling pin).

Preparation Grease your baking tin or line it with baking paper. Sift your flour (or flours) with the salt and dry yeast in a large bowl.

Note 1: All purpose flour will do, but you may also use whole-grain, gluten-free or any other kind or combination you fancy. The golden rule is, if you like it in bread, you’ll like it in a lagana.

Note 2: Although yeast is more or less the same everywhere, not all brands are. Read the instructions on the package and use the recommended amount. Fresh or frozen (thawed) yeast may also be used, if you have them. This yeast must be diluted in lukewarm water before use. Take care not to leave any undiluted lumps. Pour it through a sieve into the “crater” and proceed as below.

Make a “crater” in your flour and pour in some of the water, which must be lukewarm.

lagana (4)

Note 3: Your water must be somewhat warm for the yeast to rise. Too hot and it will kill off your yeast, too cold and your dough will take ages to rise.

Note 4: Metals conduct heat so well that they will cool down your dough and delay rising. Use a plastic or wooden bowl and a wooden table or synthetic countertop, if possible.

Gradually start pulling the flour in the water. Your aim is to have a sticky mixture, into which all flour is incorporated. Add small amounts of water as needed, careful not to overdo it.

Note 5: No one can tell you how much water your flour will hold. That depends on the kind of flour you’re using, its quality, environmental conditions (heat, humidity), even altitude. Use caution when adding water or you risk getting a batter instead of a dough.

lagana (5)

lagana (6)

Flour your countertop well and empty the dough on it. It will be very sticky.

lagana (7)

Start kneading, by folding the dough in half, then pushing down on it hard, stretching it at the same time. Then give it a quarter turn and repeat. Reflour the countertop every few rounds to keep the dough from sticking onto it. Continue until you have a smooth, elastic ball.

lagana (8)

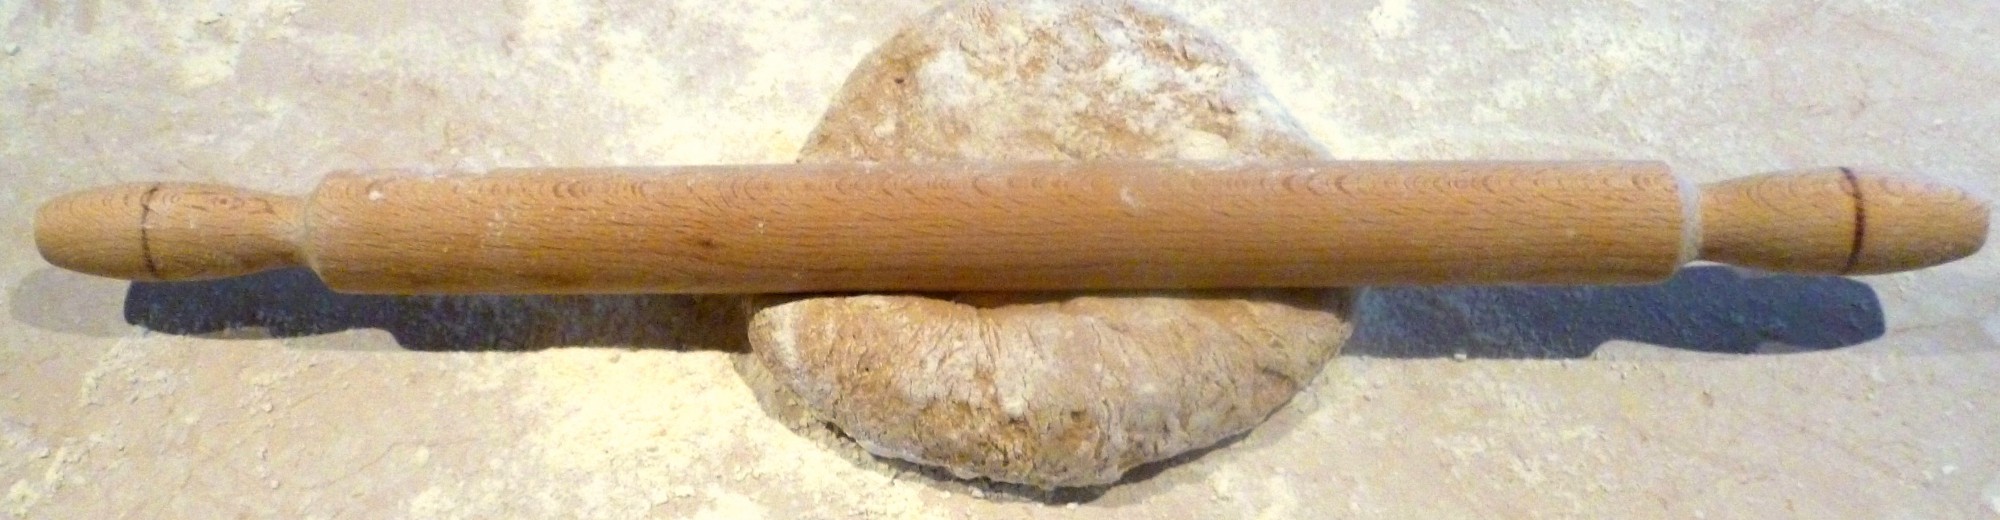
Put the ball in your baking pan and flatten it with your hands. If you’ve done things right it should be elastic and trying to go back into being a ball. I’ve found that using a rolling pin solves the problem.

Roll a thick sheet and wrap it around the pin for transfer. Lay it carefully in the baking tin and spray with a little water (so that the sesame sticks). Sprinkle the sesame and poke the bread with your fingertips here and there, to create the trademark dimples.

Cover with a towel and let it rise in a warm place, away from drafts.

lagana (9)

Note 6: Rising needs a warm environment: a cosy home will do, but if it’s cold you may want to cover your lagana (pan and all) with a blanket or two. Alternatively, put it in the oven at 30 ⁰C (86 ⁰F) convection. If using the first method, preheat your oven at 180 ⁰C (356 ⁰F). If using the second, simply turn up the heat when it’s time to bake.

After about 20 minutes in a warm environment, the lagana should have risen and be ready for baking. Bake for 20-30 minutes, depending on the thickness of your Lagana and how soft or crispy you like it.

lagana (2)

Enjoy!

Note 7: Lagana makes excellent sandwiches. Just cut a piece, slice it in half horizintaly and fill with whatever strikes your fancy. It also freezes well. Simply cut into pieces and freeze in plastic bags.

Jumbo beans casserole (gigantes fournou)

“Gigantes” in Greek means literaly “giants.” This recipe will work with any bean but it is traditionally made with the largest of white beans called, of course, “giants.”

Whether a hearty main course or an appetiser, served before the main course, this is a delicious dish. It is so filling, that I can’t help wondering why it was ever thought of as an appetiser. Perhaps the idea came to a thrifty housewife with too many guests and not a big enough chicken for everyone – who knows?

The recipe is quite straightforward: cook the beans, prepare a sauce, then mix both together and cook again in a casserole dish.

Jumbo beans casserole (gigantes fournou)

Preparation time: 8+ hours

Active cooking time: about 30 minutes

Recipe of medium complexity

Appropriate for vegetarians, vegans, diabetics, celiacs. Kosher & Halal.


For the beans

½ kilo (1 lb) of large (jumbo) beans; water

For the sauce

½ cup of olive oil

2 onions

4 cloves of garlic

1 cup of parsley, chopped

1 kilo (2 lb) of fresh tomatoes or ½ kilo (1 lb) of concentrated tomato juice

Salt and pepper to taste, a pinch of red pepper, some oregano, a teaspoon of sugar

Utensils

Large pot or pressure cooker, deep skillet or wide pot, colander, deep casserole dish


Preparation

Overnight, sort the beans and wash well. Put them in a large pot and cover them with plenty of water. Let them soak for 8-18 hours.

P1370774

Tip 1: The longer they soak, the faster they’ll cook. If you forget to soak them overnight, try soaking them in hot water in the morning. They should be ready to cook by the time you get back from work.

The next day, set the heat to high and bring the pot to a rolling boil. Let the beans boil one or two minutes – they will froth.

P1370775

Strain them using a colander.

P1370776

Rinse the pot, fill it with water and put it back on the stove. Once the water boils, add the beans. Reduce heat and boil till tender. Pour the beans and cooking liquid into a deep casserole dish.

P1370778

Tip 2: If you need to top up the water while cooking, use hot water; cold water will wash away the flavor and the beans will taste bland.

Tip 3: In a pressure cooker the beans will cook in 20-40 minutes, depending on their size, age (old ones cook longer) and how long they soaked.

While the beans cook, preheat the oven to 200 °C (392 °F).

Chop the onion and garlic.

P1370702

P1370705

Sauté the onions in a deep skillet until translucent.

P1370704

Then push them aside to form a crater and, when the oil pools there, add the garlic.

P1370706

Tip 4: Garlic lends a wonderful flavour to the food if it is sautéed in hot oil. However, it burns easily and turns bitter, destroying the flavour of the dish when cooked on a high heat for a long time. That is the reason for the crater: the garlic will fry in hot oil, but will not overcook, as the onions are already cooked. Turn the heat down almost immediately.

Turn the fire to low and cook slowly, stirring often, until the onions caramelise.

P1370707

Add the tomato sauce and sugar.

P1370709

Cook for about 15 minutes or until the liquid has been reduced by half. Add the chopped parsley and spices, reduce heat and cook until all the water has completely evaporated.

P1370712

Tip 5: You may replace parsley with celery. If you do, sauté the celery with the onion and garlic. Omit the oregano.

Taste and adjust the seasonings to your liking, then pour the tomato sauce over the beans.

P1370781

Stir well, until all the beans are immersed in the sauce.

P1370782

Bake for 45 minutes, pulling the dish out of the oven and gently stirring the beans 2-3 times while they cook, so that all cook evenly.


P1370784

Tip 6: The aim of baking is for the flavours to blend and the sauce to thicken. The beans will not cook further (the acidity of the tomato will prevent that), so they must be done to your liking before baking.

Tip 7: The sauce should be moderately runny when you take it out of the oven, but it should set as it cools. For the dish to succeed, the beans should have no less than 2 cups of the water they were cooked in when they are put in the casserole. Otherwise the dish will be unpleasantly dry.

Tip 8: This dish improves if left a day or two in the fridge for the flavours to blend. You may use it as a main course in the middle of the week and then serve it as an appetiser during the weekend, when you entertain guests. “Upping” the number of dishes on the table by this simple method is a trick used by Greek housewives of old to impress guests with their home-making skills.

Tip 9: Jumbo beans freeze well, without losing flavour or texture.

Bon appétit!

P1370786

Vassilopitta or New Year’s Pie

In every Greek home, as soon as the new year’s countdown is over and people have embraced and exchanged their new year’s wishes, they gather around the table to cut the Vassilopitta, also known as the “New Year’s Pie”.

Vassilopitta (14)

This is usually a rich cake with the New Year’s number written on top and a little surprise within: a coin to be found when the cake is cut. Tradition says that the person who finds the coin in their slice will enjoy good luck all year round. Some families leave the matter entirely to luck but in others, the parents conspire for the coin to be found by one of the children. No matter who gets the coin, the sweetness and richness of the cake symbolise our wish for a sweet and rich new year. There’s an interesting story behind it too, which you may read about here.

Every region of Greece has its own recipe, handed down from mother to daughter to granddaughter; some are rich, others more frugal. Some are sweet and others savoury, with cheese or even meat. Some are like cakes whereas others are made of several layers. However, traditionally, the new year’s cake must be round (an auspicious shape). An exception is very large ones, for clubs, societies and the like, which are usually rectangular. Recent non-traditional variations call for various glazes and the addition of chocolate.

The recipe I’m giving you today was my grandmother’s, but I’ve played with it a little to improve its texture, as it used to come out rather dense. Also, I’ve replaced the ash water that granny used with its more modern equivalents of soda and baking powder.

This cake can be made and consumed all year round (of course, without a coin). Being vegan, it is particularly popular during Lent, when it is fortified with nuts and raisins (about a cup each, rolled in flour first, so as not to stick to the bottom).

Vassilopitta or New Year’s Pie recipe

Active cooking time: about 10-15 minutes

Baking time: about 45-60 minutes

Easy recipe

Appropriate for vegetarians and vegans. Kosher & Halal.


Ingredients

Dry group:

3.5          cups                     all-purpose flour

1              teaspoon             baking soda

1              teaspoon             baking powder

1              teaspoon             ground cloves

1              tablespoon         ground cinnamon

Wet group:

1              cup                         sugar

¾             cup                         sunflower oil (or any other cooking oil with a mild flavor)

½             cup                         brandy

1.5          cup                         fresh orange juice

1              tablespoon         grated orange rind

For dusting:

1-2           tablespoons         powdered sugar

Utensils

Two mixing bowls, whisk, wooden spoon, baking pan/pans, small sieve.


Preparation

  • Grease well and flour your baking pan or pans. Shake off any excess flour.


Vassilopitta (1)

Tip 1: Use a mixture of flour and cinnamon – if you use white flour alone, it will stick to your cake in ugly white patches.

Tip 2: Instead of throwing away any leftover flour, put it in the measuring cup and use it.

Tip 3: Use a pan that measures about 23 cm (9 in) across. Alternatively, you may divide your batter in two smaller pans and make two pies. If the pan is too small and the batter is spread too thick, the cake will not bake through.

  • Wash well and dry the coin that you’re going to use for the pie. Wrap it in a piece of tin foil and put it aside.

Vassilopitta (2)

Tip 4: The New Year’s Coin is not to be used as money but saved throughout the year for good luck. For this reason, many people put in the pie special coins made for the purpose (with the year’s number on) or use collectible ones.

  • Sift all the dry ingredients in a wide bowl and leave aside.

Vassilopitta (3)


  • Beat the oil and sugar together.

Vassilopitta (4)

  • Add the brandy,

Vassilopitta (5)

… orange juice and rind.

Vassilopitta (6)

Beat lightly after each addition.

  • Pour the dry ingredients into the wet mixture and mix well with a whisk or wooden spoon. The batter should be quite thick and sticky.

Vassilopitta (7)

Vassilopitta (8)

  • Pour the batter into your pan. Drop your coin in, close to the edge of the pan and flatten the surface above it as much as possible.

Vassilopitta (9)

  • Bake at 175 ⁰C (350 ⁰F) for 45 – 60 minutes or until a knife inserted in the middle comes out clean. Don’t be alarmed by the cake’s dark colour, due to the cinnamon.
  • While the cake bakes, take a piece of paper as wide as your pan and make a cut-out of the year’s number. Cut it around, making sure the numbers are not separated.
  • Once the cake is out, let it cool. Pop it out of the pan carefully and put it in a nice platter.  Lay the paper cut-out on top and spray with a little water, to just moisten both.

Vassilopitta (11)

  • Dust with powdered sugar using a small sieve. Lift the paper with a broad knife carefully to remove it.

Vassilopitta (12)

Vassilopitta (13)

  • Decorate with season’s decorations, if you have any.

Vassilopitta (14)

Have a Happy New Year!